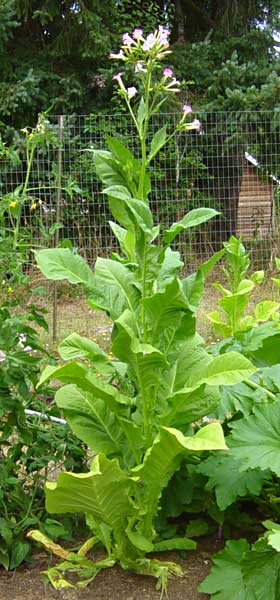
6-foot-plus Tn-86 tobacco plant flowering
in raised hay-bale bed
Here in Western Oregon (temperate rainforest with brittle summers and 8-9 months of cool, rainy weather), the most respected gardening expert is probably Steve Soloman, founder of Territorial Seeds and author of the excellent books “Gardening When it Counts” and “Growing Vegetables West of the Cascades.”
I tend to follow his advice on most things, but he feels that raised-bed intensive gardening, lasagna/no till, and similar methods that leave mounds of material lying above the ground through the Winter are unsuitable for a climate that rarely gets cold enough to interrupt the life cycles of insects and fungi; piles of mulch can give them a place to pass the winter and get a big head start on the sort of fragile things we like to grow (ie, most domesticated plants.)
I have ignored this advice in parts of our garden for 4 years, and so far the non-tilled beds (I’ll describe my method below) have had the lushest growth and heaviest production, with no more insect damage and much less powdery mildew damage than the in-ground ones. I think the elevation of the beds and the fact that there’s no uncomposted garden refuse in or on them is responsible for the lack of powdery mildew ? which seems unstoppable here; top-water a squash 3 or 4 times and its days are numbered.

Zucchini and delicata squash plants in raised bed
(haybales hidden by the lushness)
Here’s how we got the big, lush plants pictured. Not exactly no-till, more like one-till and a little mixing. The items marked “optional” are things that I haven’t done in every bed, but which I think helped.
Creating the beds:
- mark off a 2-4 foot wide rectangle (length is dictated by need, materials on hand, or time. width is determined by your height and flexibility ? you want to never, ever step inside the beds, because that would compact the nice fluffy soil you’re making)
- put down a couple of inches of finished compost and a couple of inches of straw, alfalfa stems, etc.
- put down some sand (optional ? done because we have heavy clay soil)
- add any other amendments you want to use. layers of soil are good for texture and jump-starting the microbial life.
- mix the above ingredients together a bit with a spading fork (optional; you can lasagna it, but I find just dumping and mixing it easier than doing lots of thin layers)
- use spading fork to incorporate this mix into the top 12″ of soil (optional, worms and things will do it eventually)
- surround the prepared area with old hay bales to make a rectangular bowl. Straw may last longer and be cheaper in some places, but contributes much less in the way of nutrients.
- in the fall, when the rains are beginning, fill the box made by the hay bales with a good balanced mix of compostables (we use pooped/peed goat bedding)
- mix the compostables with the spading fork on a schedule that lets the rain moisten the top layer (it’s amazing how much water you can pour on a pile of hay without wetting it more than an inch or two deep!) You could also just add thin layers, waiting for each to moisten before adding the next.
- once it’s moistened enough to compost nicely (“like a well wrung out sponge”), cover with something to keep it from getting too soggy (tarps, sheets of wood or metal, etc)
- check periodically throughout the winter to make sure moisture levels are good
- turn compost every few weeks (optional, depending on climate, materials, depth, etc)
- by spring, I have a nice fluffy, rich, well-drained bed with very few weed seeds
Maintenance:
- when finished harvesting from a bed or portion of a bed, remove all the stalks, leaves, etc. down to the soil level and send them to the compost. Make sure you have a really hot compost for these things!
- spread a few inches of finished compost, and 6″-24″ of good compostables, and lightly mix (or not) with the fluffy soil
- control moisture level through the rainy season with covers
- a few weeks before planting, gently mix the new compost with the older stuff beneath it (if you haven’t been turning the whole thing periodically)
- put in only plants whose family has not occupied that bed for at least a year or two. Longer rotations are even safer
- eventually, the bales will break down into some nice compost. rake that into the bed and stir it in, and put a new bale down to hold the bed together
It’s not as complicated as I probably made it look there. Here’s the Cliff Notes version:
- lay hay bales to surround a rectangular area 2-4 feet wide
- dump in a bunch of crap (literal or otherwise)
- get it moist
- cover it
- uncover and give a stir a few weeks before planting
- repeat add-crap-and-stir at the end of each growing season
- rotate crops by family or pathogen/insect vulnerability
Caveat: this rich, fluffy stuff drains and evaporates moisture faster than our clay soil during our 2-3 dry months. It helps to plant close enough that there’s a good solid canopy shielding the soil from the sunlight, but these beds still need more frequent watering.
Figuring out how closely to space your seeds/starts can be tough, because things can get HUGE in these beds. Right now, we have a brandywine tomato plant at the end of one that’s about 6 feet tall, 5 feet in diameter, and very lush:
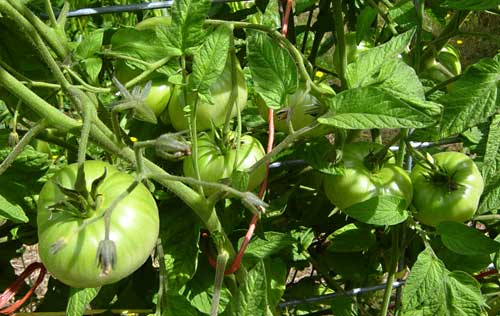
If I had used the “normal” spacing for that tomato plant, it would be the sort of hopeless tangle that our cherry tomatoes have beome in similarly rich soil.
These fluffy beds are especially good for potatoes and other things that struggle to grow in hard soil. There’s a new one waiting for November’s garlic planting, and we may try putting in some root veggies to overwinter, though it’s late for that.
Here’s a bed of canteloupe, delicata, and corn planted more conventionally, at ground level but with a LOT of compost mixed in:

It’s about as lush as the raised bed, but took several times as much effort, and is suffering a bit from the powdery mildew.
This Hopi red dye amaranth was grown in similar conditions. It doesn’t actually tell you a darn thing about the techniques I’m using, but it’s too beautiful to leave out:


