Category Archives: How To

Articles about how to enjoy a more sustainable lifestyle without deprivation

New goat house almost ready!

We’re moving our goats to a new area about 300′ from the old one, and the new goat house is almost ready. No, I’m not using a cheap camera; 90° angles are rare here, due to the use of salvaged lumber and also my inexperience with building anything on this scale; it’s sometimes difficult to push a thousand pounds of lumber into the perfect position and secure it with just two hands. But it’s darn solid and should be much nicer for the goats.

Here’s the front, with a nice wide door, to reduce the bottleneck when 9 goats try to rush through at once:

The basic structure is 4x4s with plywood sheathing, which would not stand up to the antics of a goat herd for very long, so the lower part inside is reinforced with, what else, shipping pallets:

…and their new pasture area is really, really ready for some munchin’:


Half-homemade cheese press

“Hard” cheeses such as chedder require a press to expel the moisture – just the right amount of moisture. Too much pressure, and you end up with a concrete block (yes, we have.) Too little pressure, and retained moisture nourishes unwanted bacteria and molds (yes, it smelled like the devil’s armpit.)

The cheese press we’ve been using is based on a spring. You turn a handle to put pressure on the apparatus, and when the spring is fully compressed, that’s 50 pounds. For 10, 20, etc pound presses, you guesstimate how far the spring is between fully expanded and fully compressed. It wasn’t working for us.

We happened upon this small basket with a disk that fits inside it at our favorite homebrew supply in Eugene:
cheesepress

That is MUCH better than the solid, slightly off-round PVC pipe that the spring press works with! Displayed with it was $200-something worth of fine craftsmanship and clever engineering in the form of a rather complicated lever device. It looks great, but we’ll stick with the $6.95 basket and see what we’ve got.

In preparation for such a find, I had already thrift-stored a set of barbell weights in 5 and 10 pound increments…but they are too big to just set on top of the follower disk on top of the cheese.

The solution? An empty tobacco can, a stick that was lying around in the yard, and some concrete:
follower

The tobacco can fits neatly on top of the pressing disk, and the weights fit over the post on top. It weighs 4 pounds and will probably get a pound added somehow as cheese instructions tend to be in 5 pound increments.

We’ll let you know how it works!

Snapshots from a typical Fall day on the farm

Cheesemaking is kicking into high gear?we’re freezing a lot of chevre to enjoy later when the milking slows down, and here’s the beginning of a farmhouse cheddar:

I screwed up the last batch of beer and foolishly didn’t brew for a while.  Our homemade beer (when it works, which it usually does) is much tastier than what we buy at the store, and ends up costing about half as much. 

Here’s five gallons of soon-to-be-porter bubbling away:

Last year, we got a freeze in early September that took out all the tomato plants, and Teri made a lot of green tomato ketchup.  This year, none of the main (Brandywine) tomato crop had turned red by that point, and my dreams of pasta sauce seemed to by dying?but the past month has been mostly sunny and warm, and we’re bringing in five-gallon buckets every few days. 

Though we aren’t entirely dependent on our homegrown food, it’s probably saving us a couple of thousand dollars a year now, so I have a little more appreciation for how much people doing this in the past were subject to the whims of the weather?and for what a joy it is when one’s hard work is rewarded with abundance:

In a break from my usual “functionality IS the aesthetic” carpentry ethic, I’ve made a tea table to go alongside my desk (I hate having beverages and food on the same surface as my computer).  The top was from a rough-cut slab of some unknown hardwood that I got a bunch of for free because of “imperfections”, and the base is something that was left behind when the electric co-op trimmed around the power lines. 

It’s beautiful wood?but I didn’t know that when I got it, so most of it is incorporated into the chicken coop.  Now that I’ve seen it sanded and sealed, I think I’ll be pulling the rest of it off the coop to make things from (don’t worry chickens, I have plain old fir boards to replace it).  Anyway, here’s the table, which I’m quite pleased with:

Closeup of the wood:

Worky work work!  In addition to all this, there are of course the daily chores such as caring for livestock, cooking, keeping the fire going, earning a living, etc?but some other farm residents have more sensible priorities; I leave you with “Snail Love”:


Growing big, healthy plants sustainably without breaking your back or the bank

DSC00139floweringtobacco
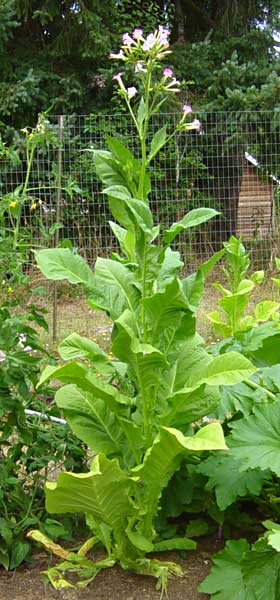
6-foot-plus Tn-86 tobacco plant flowering
in raised hay-bale bed

Here in Western Oregon (temperate rainforest with brittle summers and 8-9 months of cool, rainy weather), the most respected gardening expert is probably Steve Soloman, founder of Territorial Seeds and author of the excellent books “Gardening When it Counts” and “Growing Vegetables West of the Cascades.”

I tend to follow his advice on most things, but he feels that raised-bed intensive gardening, lasagna/no till, and similar methods that leave mounds of material lying above the ground through the Winter are unsuitable for a climate that rarely gets cold enough to interrupt the life cycles of insects and fungi; piles of mulch can give them a place to pass the winter and get a big head start on the sort of fragile things we like to grow (ie, most domesticated plants.)

I have ignored this advice in parts of our garden for 4 years, and so far the non-tilled beds (I’ll describe my method below) have had the lushest growth and heaviest production, with no more insect damage and much less powdery mildew damage than the in-ground ones. I think the elevation of the beds and the fact that there’s no uncomposted garden refuse in or on them is responsible for the lack of powdery mildew ? which seems unstoppable here; top-water a squash 3 or 4 times and its days are numbered.


green zucchini and bush delicata squash
Zucchini and delicata squash plants in raised bed
(haybales hidden by the lushness)

Here’s how we got the big, lush plants pictured. Not exactly no-till, more like one-till and a little mixing. The items marked “optional” are things that I haven’t done in every bed, but which I think helped.

Creating the beds:

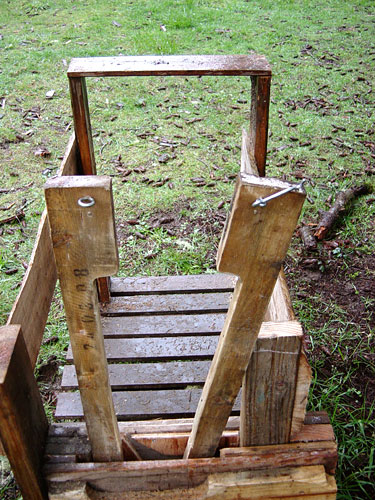
  • mark off a 2-4 foot wide rectangle (length is dictated by need, materials on hand, or time. width is determined by your height and flexibility ? you want to never, ever step inside the beds, because that would compact the nice fluffy soil you’re making)
  • put down a couple of inches of finished compost and a couple of inches of straw, alfalfa stems, etc.
  • put down some sand (optional ? done because we have heavy clay soil)
  • add any other amendments you want to use. layers of soil are good for texture and jump-starting the microbial life.
  • mix the above ingredients together a bit with a spading fork (optional; you can lasagna it, but I find just dumping and mixing it easier than doing lots of thin layers)
  • use spading fork to incorporate this mix into the top 12″ of soil (optional, worms and things will do it eventually)
  • surround the prepared area with old hay bales to make a rectangular bowl. Straw may last longer and be cheaper in some places, but contributes much less in the way of nutrients.
  • in the fall, when the rains are beginning, fill the box made by the hay bales with a good balanced mix of compostables (we use pooped/peed goat bedding)
  • mix the compostables with the spading fork on a schedule that lets the rain moisten the top layer (it’s amazing how much water you can pour on a pile of hay without wetting it more than an inch or two deep!) You could also just add thin layers, waiting for each to moisten before adding the next.
  • once it’s moistened enough to compost nicely (“like a well wrung out sponge”), cover with something to keep it from getting too soggy (tarps, sheets of wood or metal, etc)
  • check periodically throughout the winter to make sure moisture levels are good
  • turn compost every few weeks (optional, depending on climate, materials, depth, etc)
  • by spring, I have a nice fluffy, rich, well-drained bed with very few weed seeds

Maintenance:

  • when finished harvesting from a bed or portion of a bed, remove all the stalks, leaves, etc. down to the soil level and send them to the compost. Make sure you have a really hot compost for these things!
  • spread a few inches of finished compost, and 6″-24″ of good compostables, and lightly mix (or not) with the fluffy soil
  • control moisture level through the rainy season with covers
  • a few weeks before planting, gently mix the new compost with the older stuff beneath it (if you haven’t been turning the whole thing periodically)
  • put in only plants whose family has not occupied that bed for at least a year or two. Longer rotations are even safer
  • eventually, the bales will break down into some nice compost. rake that into the bed and stir it in, and put a new bale down to hold the bed together

It’s not as complicated as I probably made it look there. Here’s the Cliff Notes version:

  • lay hay bales to surround a rectangular area 2-4 feet wide
  • dump in a bunch of crap (literal or otherwise)
  • get it moist
  • cover it
  • uncover and give a stir a few weeks before planting
  • repeat add-crap-and-stir at the end of each growing season
  • rotate crops by family or pathogen/insect vulnerability

Caveat: this rich, fluffy stuff drains and evaporates moisture faster than our clay soil during our 2-3 dry months. It helps to plant close enough that there’s a good solid canopy shielding the soil from the sunlight, but these beds still need more frequent watering.

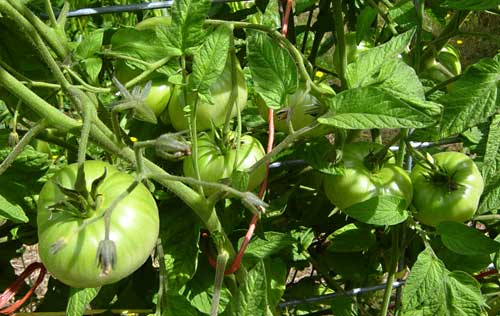
Figuring out how closely to space your seeds/starts can be tough, because things can get HUGE in these beds. Right now, we have a brandywine tomato plant at the end of one that’s about 6 feet tall, 5 feet in diameter, and very lush:
 

DSC00155greentomatoes

If I had used the “normal” spacing for that tomato plant, it would be the sort of hopeless tangle that our cherry tomatoes have beome in similarly rich soil.

These fluffy beds are especially good for potatoes and other things that struggle to grow in hard soil. There’s a new one waiting for November’s garlic planting, and we may try putting in some root veggies to overwinter, though it’s late for that.

Here’s a bed of canteloupe, delicata, and corn planted more conventionally, at ground level but with a LOT of compost mixed in:
 

DSC00143cornandsquash

It’s about as lush as the raised bed, but took several times as much effort, and is suffering a bit from the powdery mildew.

This Hopi red dye amaranth was grown in similar conditions. It doesn’t actually tell you a darn thing about the techniques I’m using, but it’s too beautiful to leave out:
 

DSC00153hopi Red Dye Amaranth


Cheese, Gromit! And something stanky…

As is usual this time of year, posts have been sparse right when there’s the most cool stuff to blog about – 36 hour days would be just about right for August and September.

We do have one milestone to report – with a borrowed cheese press and a copy of the excellent Home Cheese Making by Ricki Carroll, we have created our first hard cheese, a farmhouse cheddar that should be edible in just a month or two.

But who can wait a month or two? The cheese has been sitting out for a week to form a rind (really should have been a few days), and today we waxed it for storage, but one end was uneven enough that we worried about the wax being able to form a good seal…so we cut it off and ate it, and after only a week it’s already….CHEESE!

Here’s the cheese before waxing:
farmhouse-cheddar

Here’s beeswax in a can, on top of some canning lids in a small cooking pot to make a double boiler. The brush is a “chip” brush – they cost almost nothing at a hardware store, and their natural hair bristles won’t melt in the wax.
cheese-waxing-can

…and here’s the finished product, an inexpertly made and waxed yet already tasty cheese from our good little mini-Oberhasli goats:
waxed-cheddar

What? The cheese wasn’t the stinky part? No, it smelled quite nice. My tobacco, on the other hand…it’s coming out barely tolerable when dried over the course of a few weeks…probably intolerable to any non-smokers in the area. To make it really smooth requires a year or more of careful aging, actually a fermentation process.

Here it is in various stages of the first slow drying (greenish ones are just picked, some in the upper left have been drying for 2-3 weeks already)
tobacco-drying

Making a box for a broody chicken

Our chicken Shygirl has gone broody – this means she’s decided it’s time for some babies, so she has planted herself in a nesting box to incubate the eggs which we hope are beneath her. For the next few weeks, if all goes well, she will only leave the nest briefly to eat and defecate. Not wanting to disturb her, we have no photo, but it’s kind of funny to see her all hunkered down, looking very wide and flat, the better to cover all the eggs.

When one hen goes broody, it can be a stress on the others (the favorite nesting box is always occupied), and they will also try to lay their eggs under the broody hen, eventually resulting in a mountain of eggs that can’t be kept warm enough. That’s why I built this box yesterday, to give Shygirl a safe place to incubate and to stop the other birds from laying eggs under her (or wherever the heck they have been laying them lately! Some happy raccoon probably knows but we don’t).

The back 1/3 of the box will be filled with hay and smushed down to make a hollow for her nest, and the front part will hold small food and water dishes. It has no bottom, so she can drop her chicken poops onto the bedding beneath the box. It looks like a little bird jail, but it’s all a brooding hen wants – privacy and nearby food and water.

This evening at dusk, when they’re winding down, we will move the brooding box into the darkest corner of the henhouse and attempt to transplant eggs and hen into it…that should be fun =p

The box itself is made from one cut-up shipping pallet, a few screws, and some of the chicken-wire that held our potato mounds together last year. The top is now hinged, so the front 12″ can be opened for changing food and water. The entire top is also removable for transport and cleaning.

I bet you’ll have no trouble believing that this was built without any written plans, but it is sturdy, mostly recycled, and I think it will work very well.

Here it is with the lid removed:
broody-box-1

Here’s the lid, made of 3/4″ plywood so it’s too heavy for our little chickens to mess with:
broody-box-2

…and here’s Daks “helping”:
broody-box-daks-helps

Stanchion and stand in action

The full story of the birth of Drama’s babies is coming, we promise – in the meantime, here’s this…

We’re too busy to take photos when we’re actually milking, but for anyone who wondered exactly how that milking stand worked, here it is with an occupant happily munching away at her grain ration:
goat-in-milking-stand

Goat milking stand made from junk

UPDATE: there’s a newer post with a picture of the device being used, for anyone who wondered exactly how that worked.

In keeping with the already established aesthetic of our livestock equipment and housing, I built a milking/hoof care stand and stanchion out of old pallets and scrap wood.

Here’s the overview:
goat-milking-stand

With the stanchion open:
goat-milking-stand

Though it looks like a medieval torture device, the blue bucket full of treats keeps goats happy and distracted during milking, hoof trimming, etc.:
goat-milking-stand

Goat’s-eye view:
goat-milking-stand

Teri pointed out that it would be disasterous for a goat’s body to slip off the side while her head was in the stanchion, so I added side rails. One can be flipped out of the way to release the goat (goats don’t like to go in reverse)

Locked closed:
goat-milking-stand

Open:
goat-milking-stand

Old lawnmower wheels make this weighty contraption sort of portable:
goat-milking-stand

It may look slapped together, but typical of my engineering, it’s sturdy enough for a small elephant. I studied various sets of plans, made a few sketches, and adapted what I had in my imagination to the supply of old pallets and scrap we had lying around.

Here’s proof that I didn’t major in drafting (or penmanship, which has continued its downhill progress through almost 30 years of computer use):
goat-milking-stand