Category Archives: Construction

Entries about the various things we build around the property using salvaged wood, shipping pallets, and the like

New goat house almost ready!

We’re moving our goats to a new area about 300′ from the old one, and the new goat house is almost ready. No, I’m not using a cheap camera; 90° angles are rare here, due to the use of salvaged lumber and also my inexperience with building anything on this scale; it’s sometimes difficult to push a thousand pounds of lumber into the perfect position and secure it with just two hands. But it’s darn solid and should be much nicer for the goats.

Here’s the front, with a nice wide door, to reduce the bottleneck when 9 goats try to rush through at once:

The basic structure is 4x4s with plywood sheathing, which would not stand up to the antics of a goat herd for very long, so the lower part inside is reinforced with, what else, shipping pallets:

…and their new pasture area is really, really ready for some munchin’:


The $5 chicken tractor

Chicken tractor. Even if you know what one is, the term conjures amusing images of a rooster on a John Deere, working the throttle with a wing and shooting tobacco juice out the side of his beak. OK, so what IS a chicken tractor? It's a movable cage with no bottom, allowing the birds to enjoy the bugs and grass in a chosen area while simultaneously tilling and fertilizing…without flying over to visit the neighbor's dogs or ripping up your new blueberry bushes (we had 4 in the spring, now it's more like 1 1/2; chickens can't resist a good, deep mulch!) In addition to giving chickens a chance to enjoy natural foods and activities without getting into trouble, a chicken tractor can be used to prepare garden beds. Make it the width of your intended planting area, and the chickens will gobble up the weeds and seeds while tilling in some excellent fertilizer. (Be sure to give chicken poo plenty of time to decompose before planting, though – it's strong stuff and can kill plants when fresh.) Tractors can be made in any size or shape. The considerations: you should be able to move it yourself, it should be high enough for them to hop over each other if they get bunched up in a corner, and of course if you want to do it for $5 the materials you have on hand will dictate the size. The assembly should be pretty self-explanatory. For this one, the $5 represents an investment in screws and chicken wire; the rest of the tractor is made of a used shipping pallet, some wheels off a dead lawnmower, an extra tie-down cleat from a pickup truck, and a square of scrap plywood for the door. Here's the side view. How long is it? However long the slats on the pallet were – about 6 feet:

chicken_tractor-side


Front view. Door slides between scrap-wood tracks; handle is the aforementioned tie-down cleat.

chicken_tractor-front


This is the cool feature…lawnmower wheels often incorporate a doodad that allows you to change the height. I placed them in such a way that when they're fully up, they don't touch the ground (see the wheel spinning freely?)

chicken_tractor-wheel_spinning


Here's the wheel hardware in the raised position:

chicken_tractor-wheel_up


Here I am moving the little tab to lower the wheel:

chicken_tractor-moving_wheel_down

With the wheel on the lowest setting, there's about 2" of clearance, making it easy to lift the other end and move it around like a wheelbarrow: chicken_tractor-wheel_lowered

Screws were used rather than nails, because they hold a little better (especially when the frame might flex a little) and they allow you to disassemble and reuse the materials later. The chicken wire was attached using a staple gun, which is an indispensable tool for making poultry housing. There should always be water and shade available, and ideally grit and a bit of regular chicken food in case the bugs aren't cooperating. In a larger tractor, you can cover the corner that's pointed toward the sun, or you can just put a pet crate in as we've done here. Happy tractoring!

The developing nation of Goatlandia

Three months of milking under a tarp suspended by old haybale cords was quite enough; I broke our usual rules and made a milking shed out of mostly new materials. Still needs a door, but when the rains come back in a month or two this will make early mornings much more enjoyable.
milkingshed2

…not that there’s any milk to be had; while the goat house is under construction, all the goats are together in one room at night and the babies are leaving the mamas dry in the morning.

Soon we’ll be back to cheese and yogurt making when we open the South wing of Caprine Towers, thanks to a neighbor who had excess shipping pallets and another one who donated an old metal roof:
goathouseexpansion2

Where’ve you guys been hiding out?

The best times of the year for blogging are also the ones when it’s hardest to find the time…but here’s a quick update on happenings around our homestead.

In the garden

Fairytale Eggplant – delicious, 3″ beauties:

Blue Lake bush beans are starting to flower:

The tobacco experiments are going better this year. The tallest of these is about 5′ now, because it’s in the raised hay-bale bed filled with pure composted goat bedding/poo:

Watermelons are enjoying the poo-bed, too:

Here it is from the end…zucchini closest to the camera, with 2′ long leaves:

…but even in rather poor soil, zucchini plants just keep cranking the food out like nothing else we grow:

Lemon cucumbers are struggling a bit, but producing well despite whatever I’m doing wrong:

Our little fig tree is going strong:

Delicata squash – one of my favorites. We saved seed from our Wintergreen Farm CSA boxes last year, I’m really glad they grew:

The peas have been wonderful this year, making new pods as fast as we can pick them for months, and are just slowing down now:

Summer is nothing without tomatoes…we have probably about 50 or 60 plants, mostly Brandywine red, seen here:

Sweet 100 cherry tomatoes break our no-hybrids rule, but they’re 6′ tall and LOADED with fruit:

Although 1 good zucchini plant is enough for a small family, we have the two giant ones int he pure poop, plus a few more seen here keeping the cantelope vines company:

Beets are about ready to harvest, and we’re planting more. We both love beets, they store well, you can make dye from them, and if all else fails, they’re good goat food:

Black oil sunflower seeds are great livestock feed…they’re scattered here and there, but next year we’ll probably plant a large field of them:

Finally for this segment – apples! Many of the trees lost their buds in a late freeze, but for some reason this tree is as apple-y as ever:

Infrastructure report

The construction never, ever stops. The goats are now enjoying another 1/4 acre of pasture that I’ve fenced off, and we’ve enclosed about 1500 sq ft around the chicken house so they can still enjoy some freedom on days they don’t have the run of the whole property.

They’re perfectly capable of flying over the fence, as one does every morning to lay her egg in our woodpile, but so far they haven’t figured out that the flying over the fence trick works in both directions. Chasing and flapping ensue.

Since we started milking our goats this spring, we’ve been doing it under a rickety “just for today” tarp arrangement that’s not much fun when it rains:

…but soon, we’ll have a nice, snug 8’x8′ milking shed:

The big old red truck has some problems that I don’t have the time to deal with, and 8mpg isn’t very good even for something that only goes on the road a few times a month. A friend gave me a nice deal on his old truck, a much more reasonably sized Mazda b-2000. Only the perspective makes them look similar in size.

Cuteness

No blog post would be complete without a goat picture…here’s Drama about to eat my camera:

A new roommate, and some feathered houseguests

So, chickens. Where to begin? When last I posted on chickens (about 6ish weeks ago), we had just caught our first glimpses of Shygirl’s new chicks, and were waiting to see if any more would hatch.

The day after I wrote that post, Shygirl left her nest (and the remaining three eggs), and made a new nest for herself and her four little ones. The other eggs had gotten cold, so we thought they probably wouldn’t hatch. I removed them from the nest. As I was carrying them away, I realized that one had a hole in it. As I looked closer, I realized that there was movement inside. Then I heard a soft little peep.

Our goat mentor friend was over at the time, and we rushed the eggs into the house. She held the active one in her hands above the wood stove to warm it up, while I raced around making a nest out of towels in a cardboard box for the other two eggs, filling hot water bottles to place in the box, and moving the whole contraption onto a chair next to the wood stove.

See the hole in the side of the egg? The other two eggs are wrapped in the towels next to the hot water bottle on the left.

box-incubator

Soon we could hear more peeping coming from the egg, and could see a little beak starting to enlarge the recently pipped hole.

Once Peter returned to the house (from the goat pen, aka Goatlandia), he remembered an old aquarium he’d found in the shed, and rushed to clean it out and fill the bottom with straw for a makeshift incubator. We found an old clamp light and a 100 watt bulb to place over the top for heat, and moved the eggs into their new and improved nest.

improved-incubator

The photos of the little bird hatching, that Peter put up a couple of posts ago? That was this egg, the first one to hatch in the house. That evening, we were able to successfully place the healthy chick back in the coop with Shygirl – she pecked at it once, then watched it suspiciously until it ran to her and dove under her chest. Then she rather contentedly settled in for the night – now with five babies.

The next day (Sunday), one of the final two eggs started chirping and pipping (cracking a hole in the egg). We waited and watched all day and late into the night. After they’ve made the initial hole, the chicks will then have a long rest period during which they’ll absorb what’s left of the yolk before they start pipping again. But this one seemed to be taking too long – it would start pipping, but not get very far, and then take another extended rest. And its peeps were sounding weaker.

I was starting to get worried, so somewhere in the wee hours of the morning, I decided to help. Unfortunately, more of the shell came away than I’d intended, and I saw that there was still a blood flow between the chick and what was left of the yolk. I also saw that the membrane that is located between the chick and the eggshell seemed dry and tight, and seemed to be holding the chick inside.

We ended up watching and waiting until about noon on Monday, when it was definitely getting weaker, and we were pretty sure it was not going to make it out on its own. In order to free the chick from the membrane and the rest of the eggshell, I held the light close so Peter could see, and he, very carefully, pulled off bits of eggshell with a tweezer, and with a dropper, dribbled bits of warm water on the membrane (which was stuck to the chick’s down) to moisten and loosen it.

This is the chick right after the “assisted hatch” – can’t even raise its head without a lot of effort:

cheepler1

And here, see how its feet are curled? That’s from being stuck in the shell for so long – it couldn’t stand or walk properly for the first day.

cheepler2

With the chick being so weak (and honestly, we weren’t even sure it would live), we couldn’t put it back out in the coop with Shygirl and the other babies. For chickens, one weak bird can make the entire flock vulnerable, so their instinct is to drive it away or dispatch it themselves. So we had ourselves a house chicken.

This is our new roommate at one day old, now able to stand and walk:

one-day-old

Fast forward to two weeks old: he/she is thriving, has learned to fly, and has graduated from the aquarium to a borrowed medium-sized dog kennel (complete with branches to roost on, and a teddy bear for company):

two-weeks-roost

two-weeks-teddy-head

And fast forward again to the present: at six weeks of age, he is pretty definitely a he (though we won’t know 100% for sure until he either crows or lays an egg in a few months – but the big comb, wattles coming in, and general assertive nature are big clues), and he is still thriving. He’s larger than the other chicks that have been raised out in the coop with mama (even though he’s a full two days younger than the youngest outside chick), and he has up-sized yet again – this time to Daks’ large dog kennel. He loves to be held by us, and really loves to climb up our arms and sit on a shoulder or a head.

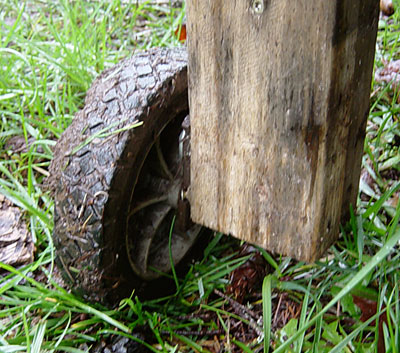
A couple of weeks ago, Peter built him a “chicken tractor” – basically a portable run, fenced with chicken wire on all sides and the top, but open on the bottom so he can forage for grass and bugs and other goodies.

Every day, around the same time that I let the other chickens out of the coop to free-range, I move the tractor to a new location and carry this little Cheepler (as we’ve been calling him) outside. And every evening, as the other chickens return to their roosts, I carry the Cheepler back inside, to his kennel in the living room.

Peter took these photos of me and the Cheepler hanging out in his “tractor” a few days ago. Look how big he is!

me-and-cheepler

cheepler-head

Eventually, we’ll try to move him out to the coop with the others, but it’ll take some time to get them all used to each other so he doesn’t get picked on too badly (though he’s already challenging Atom – our full-grown roo and patriarch of the flock – when Atom ranges too close to his tractor).

And speaking of the others: if you remember, we’d left the count at five chicks out in the coop with mama. Shygirl hatched four herself, two hatched in the house (with the one going back outside to her), and the final egg never ended up hatching.

When they hatched, mama and babies were in a broody box in the coop, so she could see the others but not get hassled by them. Once the babies were a couple of days old, we opened one side of the box so mama and babies were free to move about. Unfortunately, sometimes hens don’t like other hens’ babies, and that was the case with our Leo – she went after them.

So back into the broody box they went for a couple of days, until the weekend arrived and we could make them their own separate area of the coop (with their own private attached run) where the other chickens could see them, but not bother them.

Here’s mama and days-old babies in the broody box:

baby-head

shygirl-babes

shygirl-head

Notice anything about these photos? Yep, there’s only four babies. I didn’t notice it then – because the babies were constantly running around and under mom – but the next morning when they were all gathered around the feed dish, my heart sank to my stomach as I realized one was no longer there. We’d been having problems with rats hanging around the coop, and I’d read that rats would eat a baby chick if they could get one. I’d also read that mama hen would lay down her own life to protect her babies, but in our case, in trying to protect the babies from the other hens for a few days, we’d made it impossible for Shygirl to protect this one from a rat. My guess is that the baby managed to slip through the chicken wire into the main part of the coop – and away from mama’s protection.

So, the entire broody box – mama and the remaining four babies – was moved into our bathroom for the weekend (the only room with a door to keep out the ever-curious dog and ever-hungry cat), while we constructed an as-rat-proof-as-we-could-make-it addition to the coop. (Unfortunately, I didn’t think to take photos of that. Too bad – chickens in our bathtub would’ve made an amusing addition to the blog.)

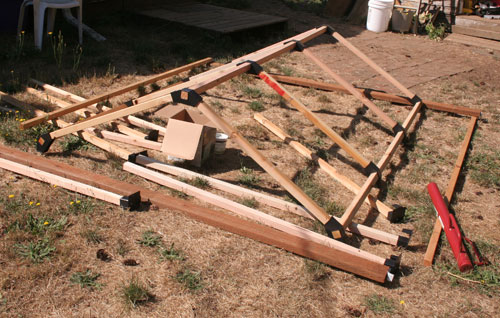
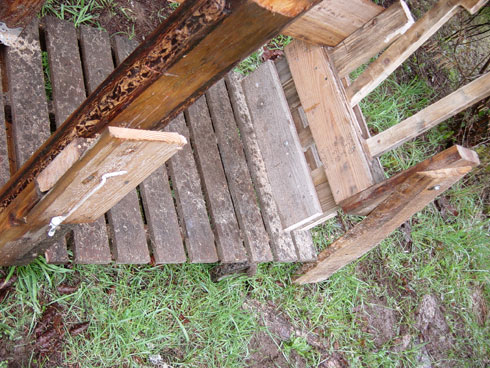
But I do have some construction photos (and yes, I contributed more than just picture-taking to the building process):

courtyard-construction

chicken-door

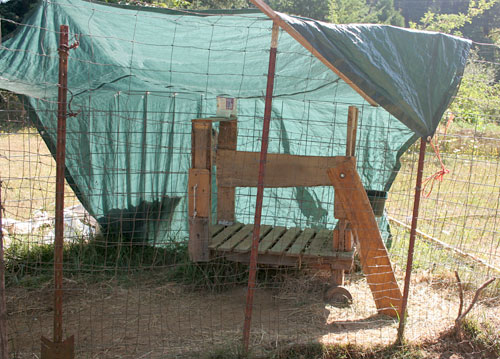
Here’s Shygirl and babies waiting for construction to be complete, so they can take up residence in their posh new abode:

waiting

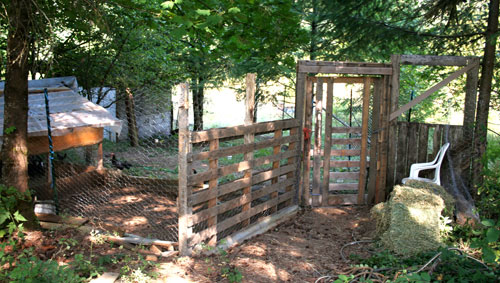
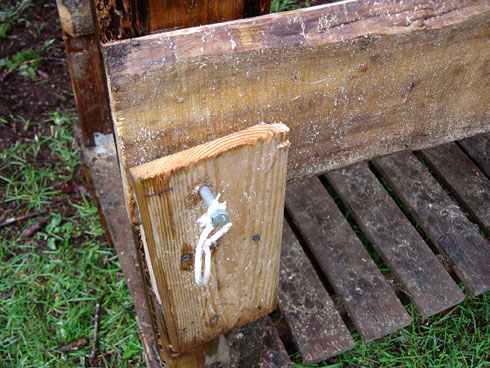
And here’s Shygirl and babies in their newly partitioned-off section of the coop (notice that we used hardware cloth instead of chicken wire – no holes large enough for a rat to get through):

broody-house

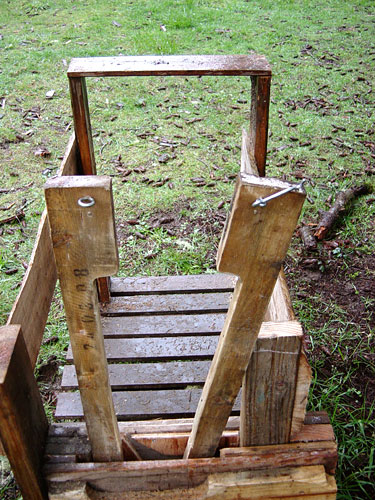
The ramp and chicken-sized doorway leads to their own private “courtyard” (see how there’s solid wood and/or hardware cloth for the bottom 12 inches all the way ’round? That’s to keep out rats. We also dug out the dirt floor, put hardware cloth down, and then shoveled all that dirt back in again – keeps ’em from tunneling in from underneath. We now have a safe space for future broods, as well.):

courtyard

courtyard-chickens

chicken-run

chicklets

The chicks are about three weeks old in those photos, which were taken about three weeks ago. Now, at six weeks of age, they are almost as big as their (younger) in-house sibling. They are also on their own. Mama Shygirl started laying eggs again last week, which signaled the end of her mothering days. I had been letting mama and babies free range with the other chickens for a couple of weeks, slowly building up the amount of time they were outside. Now, Shygirl is back in the main part of the coop with other adults. The babies are still in their private section of the coop, though during the week they free range like the others – but on their own, as the grown-ups (including mama) don’t seem to want them around. Fortunately, they are smart enough to stick close to the coop (and safety), until they’re a little larger.

Our next project is to slowly start introducing our house Cheepler to the outside chicks, so that hopefully soon he can move out to live with them. Eventually, we’ll stop separating the two flocks, merging them into one. There will be some fighting at that point, as the males and females both sort out pecking orders. It’ll be much easier on the Cheepler if he goes in as part of a group of new young ‘uns, rather than as one lone chicken destined to be singled out by both outside groups.

Update: Wondering what happened to the rat that ate the baby? I’ve seen it frequently – it’s gotten very bold – sauntering in broad daylight into the part of the coop that isn’t totally rat proof, and eating up the chickens’ food. We’d put out traps (at night only – don’t want the chickens or the dog getting caught by mistake), and always the food would disappear without the trap being sprung.

Yesterday (after I had written half of this post and put the rest aside to finish later), while in the chicken coop checking on food and water, I started hearing these gnawing and scratching sounds. I thought “That damn rat is trying to chew its way in here while I’m right here – the nerve!” and went on about my business.

As it continued, I moved toward where the sound was coming from, and heard a shriek. The rat was inside, and it was trapped between some boards in the corner!

I sent Peter (who fortunately happened to be right outside) for a flashlight, and sure enough there it was. The nearest weapon to hand was a sharp pointy stick, which Peter used to dispatch it before digging it out from between the boards. (Turns out it had gotten caught on the point of a screw sticking out from one of the boards, which is why it was unable to free itself.)

Though I felt bad that we had to kill her (yes, she was a she, and very pretty too), I also found it somewhat fitting that we finally caught the creature that ate one of our treasured chicklets on the same day that I was writing about it.

Puts the finishing touches on this (very long) story, in a way…

P.S. Apologies for the not-so-great photos of the indoor Cheepler – some of them were taken through glass, and all of them were taken with heat lamps (either a regular light bulb or a red heat lamp bulb) on.

Making a box for a broody chicken

Our chicken Shygirl has gone broody – this means she’s decided it’s time for some babies, so she has planted herself in a nesting box to incubate the eggs which we hope are beneath her. For the next few weeks, if all goes well, she will only leave the nest briefly to eat and defecate. Not wanting to disturb her, we have no photo, but it’s kind of funny to see her all hunkered down, looking very wide and flat, the better to cover all the eggs.

When one hen goes broody, it can be a stress on the others (the favorite nesting box is always occupied), and they will also try to lay their eggs under the broody hen, eventually resulting in a mountain of eggs that can’t be kept warm enough. That’s why I built this box yesterday, to give Shygirl a safe place to incubate and to stop the other birds from laying eggs under her (or wherever the heck they have been laying them lately! Some happy raccoon probably knows but we don’t).

The back 1/3 of the box will be filled with hay and smushed down to make a hollow for her nest, and the front part will hold small food and water dishes. It has no bottom, so she can drop her chicken poops onto the bedding beneath the box. It looks like a little bird jail, but it’s all a brooding hen wants – privacy and nearby food and water.

This evening at dusk, when they’re winding down, we will move the brooding box into the darkest corner of the henhouse and attempt to transplant eggs and hen into it…that should be fun =p

The box itself is made from one cut-up shipping pallet, a few screws, and some of the chicken-wire that held our potato mounds together last year. The top is now hinged, so the front 12″ can be opened for changing food and water. The entire top is also removable for transport and cleaning.

I bet you’ll have no trouble believing that this was built without any written plans, but it is sturdy, mostly recycled, and I think it will work very well.

Here it is with the lid removed:
broody-box-1

Here’s the lid, made of 3/4″ plywood so it’s too heavy for our little chickens to mess with:
broody-box-2

…and here’s Daks “helping”:
broody-box-daks-helps

Stanchion and stand in action

The full story of the birth of Drama’s babies is coming, we promise – in the meantime, here’s this…

We’re too busy to take photos when we’re actually milking, but for anyone who wondered exactly how that milking stand worked, here it is with an occupant happily munching away at her grain ration:
goat-in-milking-stand

Goat milking stand made from junk

UPDATE: there’s a newer post with a picture of the device being used, for anyone who wondered exactly how that worked.

In keeping with the already established aesthetic of our livestock equipment and housing, I built a milking/hoof care stand and stanchion out of old pallets and scrap wood.

Here’s the overview:
goat-milking-stand

With the stanchion open:
goat-milking-stand

Though it looks like a medieval torture device, the blue bucket full of treats keeps goats happy and distracted during milking, hoof trimming, etc.:
goat-milking-stand

Goat’s-eye view:
goat-milking-stand

Teri pointed out that it would be disasterous for a goat’s body to slip off the side while her head was in the stanchion, so I added side rails. One can be flipped out of the way to release the goat (goats don’t like to go in reverse)

Locked closed:
goat-milking-stand

Open:
goat-milking-stand

Old lawnmower wheels make this weighty contraption sort of portable:
goat-milking-stand

It may look slapped together, but typical of my engineering, it’s sturdy enough for a small elephant. I studied various sets of plans, made a few sketches, and adapted what I had in my imagination to the supply of old pallets and scrap we had lying around.

Here’s proof that I didn’t major in drafting (or penmanship, which has continued its downhill progress through almost 30 years of computer use):
goat-milking-stand

Chicken nest box from salvaged lumber

A year or so ago, I got a truckload of free seconds from a friend with a sawmill…nice stuff, but too knotty/cracked/warped to charge top dollar to a client for. Excellent for building livestock equipment, though!

This box is for a friend who gave us our beautiful new chickens. It’s very similar to the one I made for us, but went a LOT faster and is a bit more refined. Total investment: about 1 hour and $1 worth of screws and such.
Nesting box for chickens, made out of salvaged lumber

Finally back into the garden

What passes for Winter here is losing its hard edge now, and I’m starting to spend time in the garden again…here’s a rather disjointed post about some of the current projects:

This is going to be a raised bed with straw-bale borders. The inside is filled with old goat bedding and other compostables. Soon I’ll remove the tarp, letting water in to start the composting process. The plan is to put a layer of soil and finished compost on the top and plant into that, hoping that the warmth of the compost action beneath it will help get early plantings off to a good start.
Straw Bale Bed

Yesterday, our neighbor and I planted a hundred baby fir trees along the property’s roadsides, to eventually decrease traffic noise and provide privacy. They come in a bag about three feet long:
Treebag

Babytree
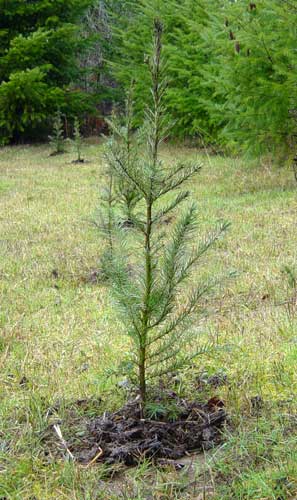
I expected the trees in there to be tiny, but they were mostly about two feet long, and very healthy looking.

This kale is actually the remains of last year’s that got harvested, then eaten down to stubs by goats, then transplanted into the cold frame, where it’s thriving.
Kale Feb 2009

Turnips are starting to sprout in the cold frame as well. It’s not the ‘right’ time of year to plant them, but with the mild climate here it seems worth trying.
Turnips

This garlic we planted a few months ago is looking well:
Garlic Feb 2009

…as is this garlic, which we planted about a year ago. It died down pretty young and I never dug it up, but it’s returned as a volunteer. (since everything is so green out here, I removed color from everything but the garlic plant to make it visible)
Volunteer Garlic

Pregnant goats!
Obers Feb 2009

Here’s a 55-gallon steel drum (used once, to transport maple syrup) set into the ground to serve as a root cellar. We haven’t experimented with putting food in it yet, but the thermometer I have in there seems to stay in the 40s no matter what’s going on outside.
Steel Drum Cellar