Archive for the ‘Recipes’ Category
This GIANT pot of stock is simmering away on our stove. Yes, that is our (guesstimate: 3 gallon) water-bath canning pot – it was the only one large enough to hold all of the bones and veggie scraps I had accumulated.
In this pot are: chicken carcasses (our own chickens), chicken feet (our own chickens), random chicken bones from random dinners (not our own chickens), beef bones, pork bones, scraps/skins/ends from all the veggies we’ve eaten over the past month or so (onion trimmings, onion skins, garlic trimmings and skins, leek greens, carrot ends, kale stems, basil stems, onion greens from the onions in the garden that the chickens tried to kill, and whatever other veggie scraps I deemed it necessary to save at the time – all saved in a ziploc bag in the freezer, until such time – like now! - as I was ready to make use of it), and saved (frozen) cooking water from previous steamed veggies (kale, onions, etc).
Oh yeah… it’s gonna be good!
And on the other burner, for tonight’s dinner: quinoa simmering in previously-preserved chicken stock (from our own chickens), to be served on a bed of fresh salad greens from the farmer’s market and topped with the leftover pesto from yesterday’s dinner (basil from the farmer’s market, onion greens from the garden, garlic from winter storage, local hazelnuts from winter storage, homemade goat milk feta, and olive oil.)
Sigh… life is good…
ETA: I forgot – the stock also contains several eggshells (from our chickens), a good dose of apple cider vinegar (it helps draw the minerals out of the bones and eggshells), and a couple of corn cobs for added flavor. It’s still simmering away, after about 20 hours! Soon I’ll strain it out into jars to cool. As it cools, the fat will rise to the top – if there’s a good amount of fat, I’ll scoop it off into another container to use as a cooking fat (otherwise I’ll just leave it as is). Then into the freezer the jars will go, just waiting to be pulled back out for some future meal! Comments (2)
…it’s what’s (was) for dinner!
Deck Family Farm grass-fed lamb, Horton Road Organics carrots (from winter storage), frozen sweet corn from last summer’s garden, garlic from a local farmer (also from winter storage), store-bought onion, fresh rosemary, oregano, spearmint, yarrow and bay leaf (all from our garden and/or yard), water, red wine, lamb fat (saved from a previous cooking of lamb), olive oil, dash of shoyu (soy sauce), kelp, salt and pepper… cooked in our cast iron dutch oven, and simmered on our woodstove for several hours… yum! We both had seconds…
At this moment:
- bread with flour we made in our Country Living grain mill this afternoon
- spicy yellow pear tomato jam
- gjetost
- chevre
- tomato sauce
Comments Off
Sausage/Kale/Goat Feta Scrambled eggs
- 1 big handful of kale from our cold frame
- 4 big eggs from a neighbor’s chickens (ours have better things to do than give us eggs these days)
- 1/2 lb ground Italian sausage from Deck Family Farm
- 1/4 cup goat milk from our morning milking (thanks Drama Queen!)
- 1 tbsp butter
- A few slices of goat milk feta from yet another wonderful neighbor
- Salt and pepper to taste
Wash and chop the kale while the butter warms up in a hot frying pan over medium heat. I guess medium heat; this was made on a woodstove. Once butter is bubbling a bit, quickly saute the kale, keeping it moving, just until it becomes a darker green and wilts. Remove kale to another dish, leaving pan on medium-high heat (or rather, adding wood and opening the air inlet a bit).
Break the ground sausage up into small bits in the pan and keep it moving till well browned. Reduce heat to medium and (after a final stir) pour in the egg/milk mixture. Let this cook until it’s solid about halfway through, then mix in the kale and scramble it up.
When it’s close to done, drop the cheese slices onto the top.
In the middle of our waiting-for-goat-babies night, I realized I was absolutely famished and needed animal fat NOW! The following took about 10 minutes of hands-on time to prepare (including running out to pick kale) and will definitely be repeated.
Kale-wrapped mint lamb burgers – 4 servings
Ingredients:
- 1 lb grass-fed free-range natural ground lamb*
- 1 tbsp crushed fresh mint leaves (from our garden last year)
- 8 big leaves kale (from our cold frame)
- 1 small egg (from our chickens)
- 4 tbsp rolled oats
- 3 tbsp shelled sunflower seeds
- pinch or two of sea salt
- several apple wood twigs, soaked in water if dry
- olive oil
- Start the BBQ on high (keep at about 400°-500°)
- in a large mixing bowl, combine ground lamb, nearly-powdered mint leaves, sunflower seeds, salt, rolled oats, and egg. Make sure the egg gets thoroughly mixed in, it helps bind the burger together and keep it fluffy & moist.
- coat a dinner plate with olive oil
- shape mixture into 4 patties, putting each one on the olive oiled plate when it’s done. Not too thick; we want to cook these at high heat, actually flame-broil them a bit, and the inside should be cooked before the outside is charcoal!
- get a little more olive oil and make sure the patties are completely coated
- put dry applewood twigs into the grill…I drop them on the lava rocks, on the OPPOSITE side from where I’ll put the food (there will be enough flame from the olive oil dripping!)
- plop the patties on the grill. the dripping oil will probably burst into flame; that’s ok. close the lid to keep the applewood smoke in.
- cook until done – the outside should be a bit seared, even slightly charred. USDA blah blah blah standards blah blah blah specify 160° internal temperature. That recommendation is geared toward the filthy, diseased CAFO stuff at the supermarket; I cook ground meat to about 145° for myself but am not advising you to do that because you will surely poop yourself to death or something. The gov’t says so! I guess I died years ago.
- Take patties off the grill and let them drain a bit on newspaper. Wrap in fresh-picked kale leaves and enjoy!
Comments Off
+
Chickens!
February 20, 2009 By Teri
Filed under: Chickens,Flowers,General Homesteading,Oregon Weather,Pets and Livestock,Recipes
Yep, our first two chickens came to live with us about a week ago. We got them from a neighbor who was wanting to thin her flock a little. One very cocky rooster (no pun intended) and a sweet shy little hen. They’re bantams, so smaller than standard-size chickens – her eggs will be about 2/3 the size of a “normal” supermarket egg.
The rooster’s name is Atom, and his job is to protect his flock. He’s very good at his job – crows all morning but barks threateningly and raises a racket if the dog wanders too close to the coop, or one of us makes too fast of a movement while we’re in there. Atom came to us with his name, but our little hen didn’t have one yet, so we got to name her. We’ve decided to call her Molly, short for Molecule (Atom and Molecule, get it?)
For now, the chickens are spending the day fenced in next to their coop. Once they’ve acclimated and know this is their home, we’ll let them out to “free range” during the day. At night, they’ll naturally return to their safe and familiar roost (the coop), where we’ll close them in until morning to protect them from predators.
We may be getting a couple more banty hens from the same neighbor within the next couple of days, bringing our fledgling flock up to four. Once spring arrives, we should hopefully be getting about a dozen eggs a week from the three girls. Eventually, we’ll probably add a few more hens in order to have enough eggs to share with friends or possibly sell.
And on another note, here’s part of why we love Oregon so much: it’s mid-February, and the crocuses are blooming. How crazy is that? In fact, it’s not just the crocuses – today we found some pretty little white flowers (as yet unidentified), and the Iris leaves have sprouted as well.
Even the Indian Plum has buds already.
Around 10am, I was working at the computer and heard a loud “POP!” out by our telephone pole, and all the electric went down. The electric co-op got a repairman here very quickly, and he extracted a fried squirrel from the transformer by our house. I’m afraid it’s the one we were getting friendly with, who would steal sunflower seeds from the shed when he thought we weren’t looking. I buried him in the yard, hope it’s not the one we were befriending.
Since our driveway is overgrown a bit, I had to trim a few small branches for the electric guy to get his truck in. The goats were VERY happy about this:
I found a recipe online for making gjetost, a sweet, salty brown cheese I enjoyed in Sweden (and occasionally from a specialty shop here). It’s not a moldy type cheese, it’s boiled-down goat whey (the watery stuff left after you use goat milk to make a hard cheese).
Luckily, since our goats won’t be giving us milk until next Spring, I found a neighbor willing to part with a few gallons of whey, which would otherwise have been fed to her dogs. After boiling all day long, the two gallons of whey was a brown paste about 1″ deep in a 12″ pot. I whipped it smooth with a little hand blender and refrigerated. And it worked!
This is a love it or hate it cheese; carmelized lactose with lots of salt, about the consistency of peanut butter. My first batch turned out a little grainy, so I gave the second one more whipping with the blender, which seemed to help a bit. I was too busy to document the process, but here’s the recipe I followed, with some photos below.
How to Make Gjetost
Wrapped up for freezing:
Spread on a cracker*:
* The first batch was a little soft, so technically was mytost (same thing, but spreadable)
Spread on a cracker*:
* The first batch was a little soft, so technically was mytost (same thing, but spreadable) Comments Off
Radishes are easy to grow and very fast. I really must remember to do succession planting on such things – a few plants every week, so there are always fresh ones. But for now, we have a surfeit of hot little red roots, so before the worms get in (which happens if they’re left in the garden after becoming ripe) something must be done. That something is a “quick” (non-fermented) pickling:
QUICK-PICKLED RADISHES
Makes about one pint
1 1/2 cups sliced radishes
10 fl oz vinegar
10 peppercorns
1 bay leaf
2 teaspoons salt
2 teaspoons sugar (optional, or use honey, stevia, etc.)
1 small onion
First, obviously, we need to pick some fresh, organic radishes, fertilized with last year’s kitchen compost and a bit of composted horse manure:
The greens can go into a salad (they’re a little bitter to be the whole salad, but a nice addition), or into the goats, if you’re so equipped.
Then we slice up the radishes along with an onion:
Bring vinegar (we used a mix of brown rice and apple cider vinegars), peppercorns, salt, and sugar to a simmer to get everything nicely dissolved, then cool it off so you don’t blow up your canning jar:
Put the radishes and onions into the jar, and pour the cooled vinegar mixture over them:
Refrigerate overnight, and the next day you will have delicious pickled radishes floating in a red juice. The smell when you open it is pungent, but the radishes themselves are crunchy and delicious, their sharp flavor mellowed.
These will last at least a week in the refrigerator. With a stronger solution, they might last longer, but really what we need to do is some proper fermentation pickling…soon!
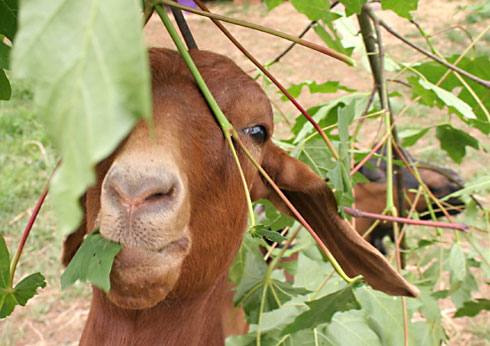
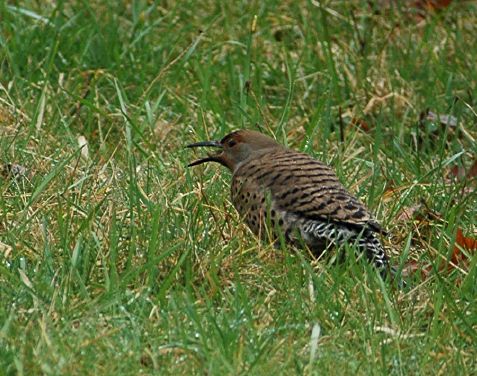
First, I notice that there’s a big pretty bird in our yard, that I’ve never seen before. He’s so distinctive that I have to try to identify him. Thanks to my handy-dandy Audubon Society Field Guide to the Pacific Northwest, I can pretty confidently say that he (along with his partner, who showed up later), is a Northern Flicker, part of the Woodpecker family. Since I’m still avoiding studying, I decide that I would be remiss if were to miss this opportunity to get some photos of the pair of them. (Notice that the male has the red spots on his cheeks – the female’s coloring is similar to the male’s, but she lacks those red spots.)
Next, I remember that Peter had separated the cream from our latest jar of fresh raw cow’s milk (if you missed it, he posted about our first raw milk tasting and the local family farm that’s supplying us here), setting it aside to try our hands at butter-making. Suddenly it becomes quite urgent to get the butter made today – so I pull the mason jar from the fridge and start shaking. And shaking. And shaking. When my arms start feeling like they’re going to fall off, I take a break. By this point, what I have in the jar is whipped cream. So I shake some more. And some more. And some more.
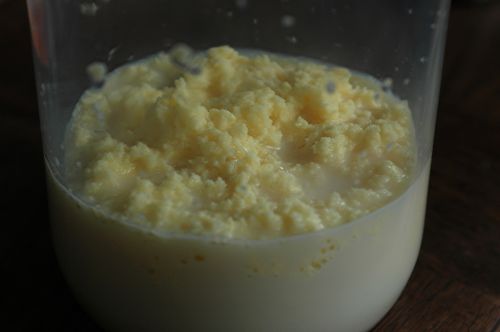
And then, whadda ya know! The curds (the chunky bits that will become the butter) begin to separate from the whey (the liquid). This is what it looks like:
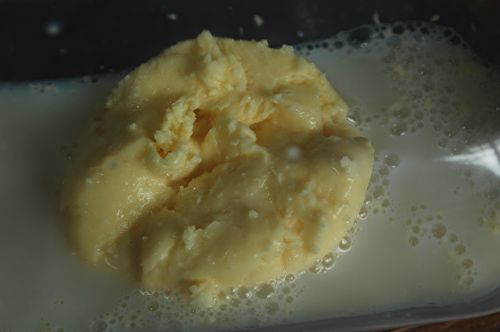
This inspires me, so I keep on shakin’. Pretty soon, I’ve got a pretty good chunk of butter in the middle of the whey (the jar is tipped on its side in this photo, to better see the almost-butter):
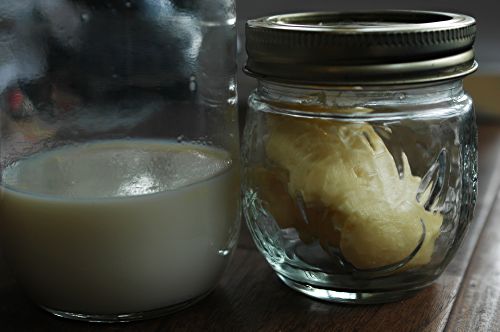
I drain off the liquid into another jar, and keep shaking for a few more minutes – the shaking is what’s separating the liquids from the solids, and I want to make sure I’ve got all the liquids out. Next, I put the hunk of butter into a bowl, and rinse it with cold water, “massaging” the butter with a spoon to squeeze out the last of the milky liquids. I keep rinsing with fresh water until the water remains clear.
Here’s what we’ve got:
And here’s the finished product put away in a jar, along with our approximately 1/2 cup of buttermilk! (I think I may see buttermilk pancakes in our future…)
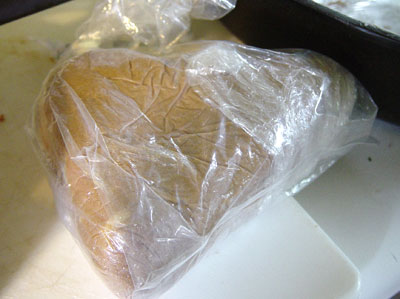
Of course, I now realize that in order to fully appreciate our first-ever batch of homemade butter, we’ll need some fresh hot homemade cinnamon raisin bread, so I move on to bread-making.
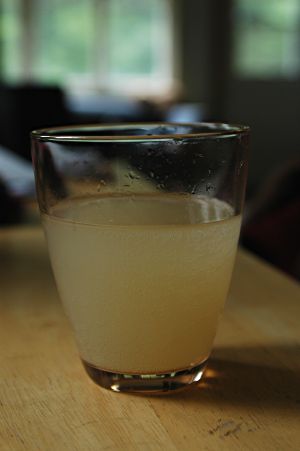
And since I’m still avoiding studying for finals, I decide that now would be a good time to tell ya’all about our first-ever batch of homemade ginger ale. I’d found the recipe a few weeks ago, but we hadn’t gotten around to trying it – until Peter got inspired and I came home the other day to a freshly-bottled batch (ignore the labels – we washed, sterilized, and re-used old soda bottles we had saved for this purpose).
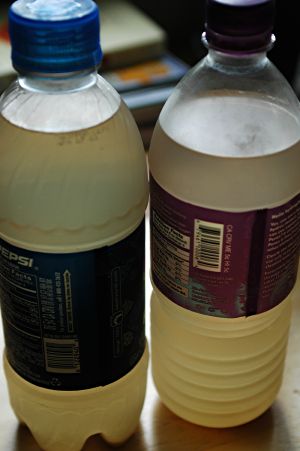
It’s actually pretty easy to make: simmer chopped-up ginger root and sugar in a pot of water for about 30-60 minutes (the longer the simmer, the stronger the flavor), then remove it from the heat and strain out the remaining ginger pulp, add more water and let it cool. After about 15 minutes, add brewer’s yeast and let it sit for a few more minutes, then bottle it up! You just need to keep an eye on it – once it’s carbonated, put it in the fridge to stop the process. **Peter added a bit of cayenne to this batch as well, to give it an extra kick.
One of the best things about the homemade brew? We control the amount of sugar we use – and much of it is eaten up by the yeast. And the waste products of the yeast? B vitamins! With less sugar and actual nutrients, it’s not only tastier – it’s way healthier than the store-bought stuff.
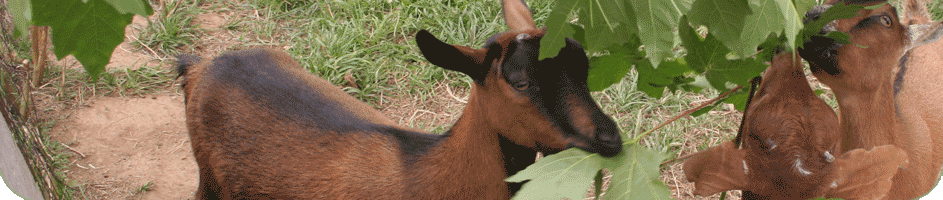
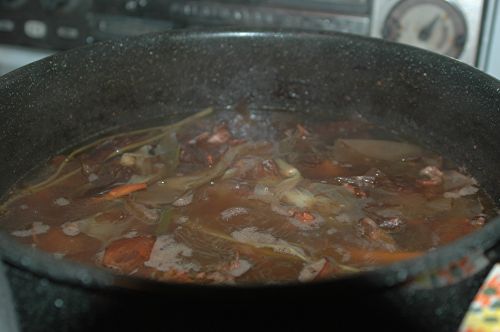
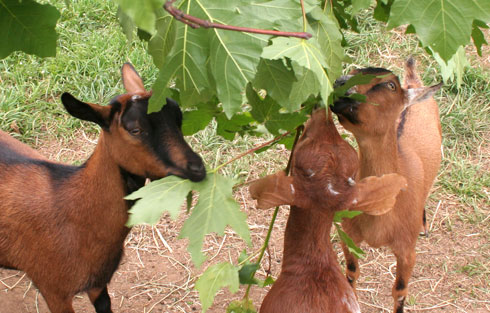
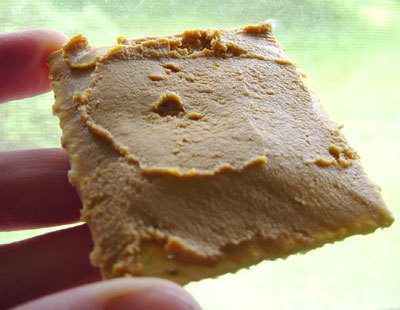
And, now that I’ve enjoyed a bowl of Peter’s homemade stew (made with locally raised goat meat), a slice of homemade raisin bread with homemade butter and a glass of homemade ginger ale, stacked a large pile of wood as Peter did the splittin’, and written up my quiet country day, I think it really is time to turn my mind to studying.
Recent Posts
- Goats for sale! ALL SOLD!
- Harvest time is so beautiful…
- Three Turkens and a Welsummer
- Sephira
- Sweet Maud and her tiny little peeps
- New goat house almost ready!
- Darn moles and voles? Darn helpful, actually.
- Lammas 2011: harvesting alliums and hoping for exotic tomatoes
- “Goat crossing”
- Heeler dog: possibly the most important animal on a small farm
Recent Comments
- Amanda on Goats for sale! ALL SOLD!
- Winnie on Harvest time is so beautiful…
- Peter on Saris Bones bike rack front-mounted on a Vanagon
- Lynn on Saris Bones bike rack front-mounted on a Vanagon
- Kelly Lomax on New goat house almost ready!
- Kelly Lomax on Who we are
- Peter on How to breed dairy goats
- lucien on How to breed dairy goats
- Janet on Sephira
- Peter on Learning to grow tobacco in Oregon
Categories
- Cheese Making
- Chickens
- Construction
- Cooking
- Current Events
- Flowers
- Food Preservation
- Foraging
- Funny haha
- Gardening
- General Homesteading
- Goats
- Hillbilly Engineering
- Home Brewing
- How NOT To
- How To
- Livestock for sale
- Oregon Weather
- Pets and Livestock
- Predators
- Recipes
- Sights
- Sustainability
- Tobacco
- Vanagon Stuff 2006-7
- What Are Your Days Like?
- Working Dogs
Archives
- August 2012
- September 2011
- August 2011
- July 2011
- June 2011
- May 2011
- April 2011
- March 2011
- November 2010
- October 2010
- September 2010
- August 2010
- July 2010
- June 2010
- May 2010
- April 2010
- March 2010
- February 2010
- December 2009
- November 2009
- October 2009
- August 2009
- July 2009
- June 2009
- April 2009
- March 2009
- February 2009
- December 2008
- November 2008
- October 2008
- September 2008
- August 2008
- July 2008
- June 2008
- May 2008
- April 2008
- March 2008
- February 2008
- January 2008
- December 2007
- November 2007
- October 2007
- September 2007
- August 2007
- July 2007
- June 2007
- May 2007
- April 2007
- March 2007
- February 2007
- January 2007
- December 2006
- November 2006
- October 2006
- September 2006
- August 2006
- July 2006
- June 2006
- May 2006
- April 2006
- March 2006
- February 2006
- January 2006
- September 2005
